

We work through architects & professional builders.
Contact us at 830-798-2717 for free signs and resources.
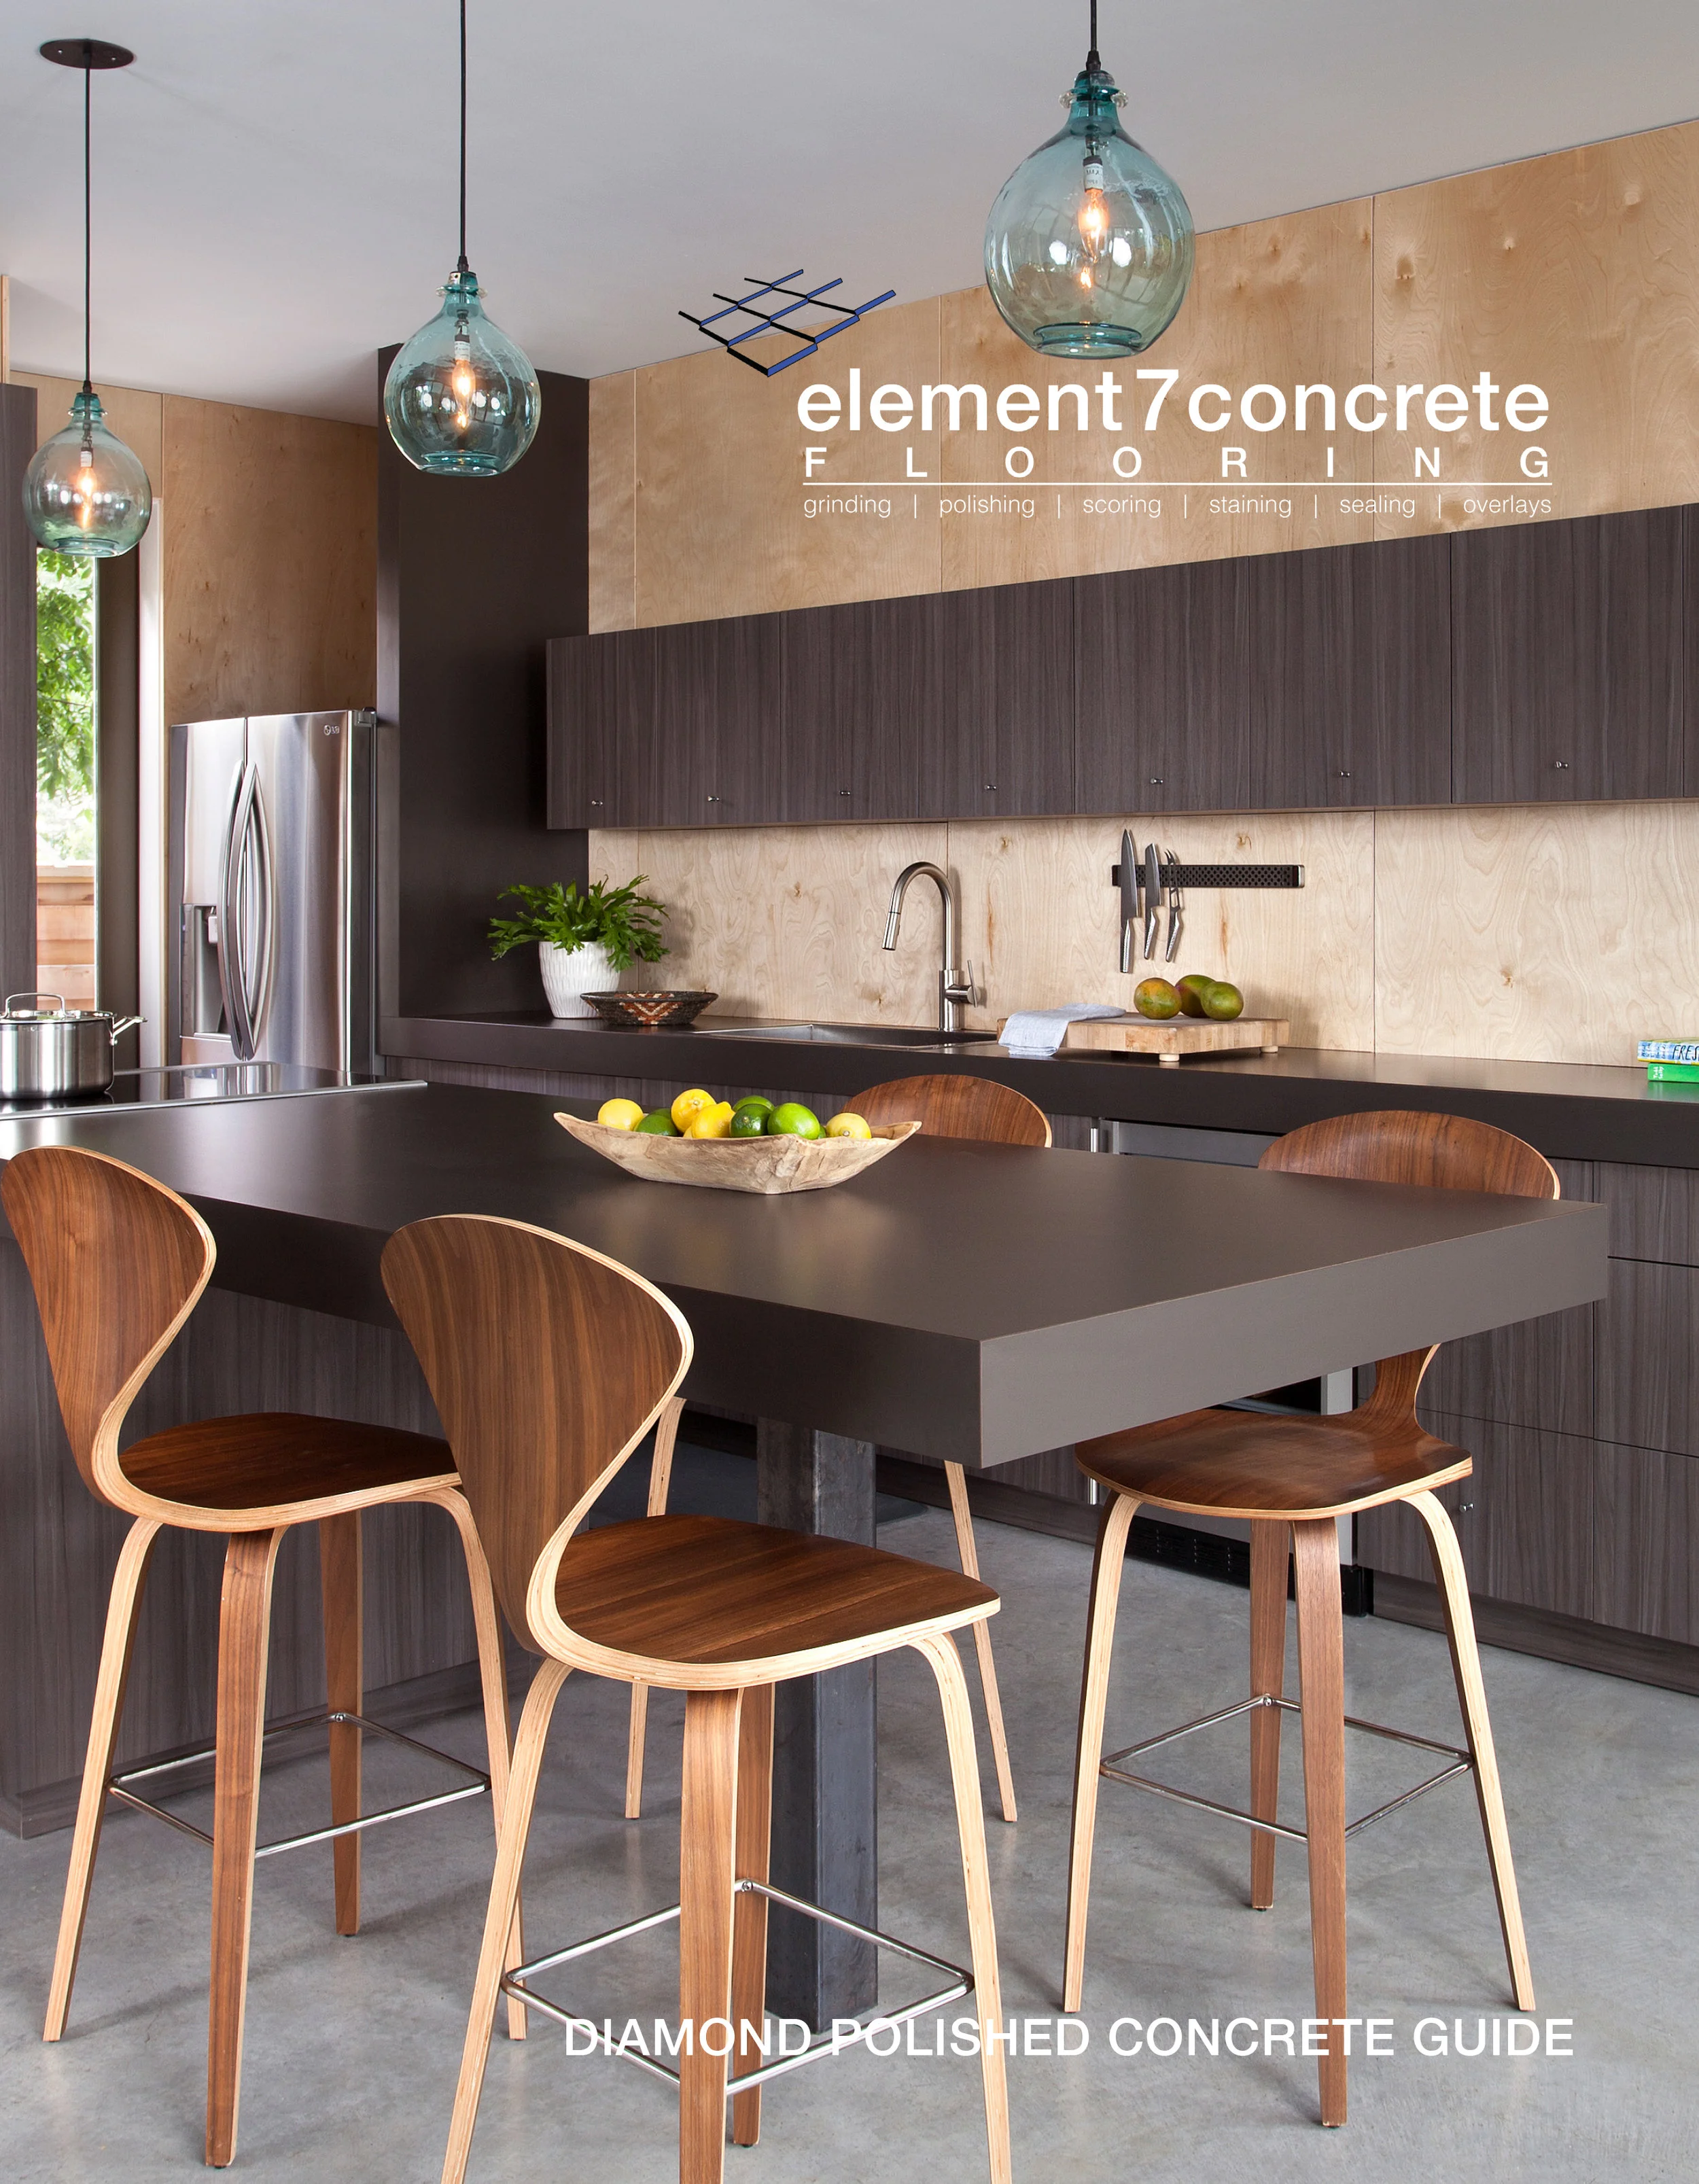
View our guide to stained+diamond polished concrete.
Contact us for a printed hard copy for your sales office.

View our concrete coatings guide.
Contact us for custom sample sets for your sales office.
General Ideas Regarding Scheduling
Exposed concrete floor require a different sequence and process than tile, wood, or carpet.
If floors are to be scored in an allover pattern or ground to expose aggregate, that should be done before framing if possible.
We can make it work with walls up, but if given the choice, let’s do this on an open slab.
Ground floors are processed with progressively finer abrasives. This is called honing and polishing.
Honing, staining, densifying, polishing, and stain-guarding should all happen after the structure is 100% dried-in, but before installing drywall.
This is because these are wet, messy processes.
Also, our finished floors are much harder to mess up than unprocessed concrete, so sooner is better than later.
After honing, staining, densifying, polishing, and stain-guarding, the floor is covered with temporary floor protection.
To avoid is taping directly to the concrete, we use a thin paper around the perimeter that may function as the masking when trim is painted.
If the drywall team makes a mess, and the trim-carpenter wants that old paper out of there, do not just remove, but replace the paper. We are glad to help with that.
Engage us as early as possible: some things your client may want may require coordination at the time of concrete placement (see below).
Enhanced Concrete Placement
You may want us to team up with your placement team to help install integral color, color hardener, inlays or stamping.
With woodworking, there are framers, and there are trim-carpenters: those are two very different workmen.
Concrete is no different: placement contractors and element7concrete are very different.
Just as a trim carpenter doesn't ask much of the framer to finish well, we can work with what we are given.
For interior floors with our standard finishes, there is nothing we badly need to make a great floor for you.
That said, just as certain details are best when the trim-carpenter and framer team up, white floors, black floors, seeded aggregate, inlays, and stamping are best done with element7concrete and your placement team working together on the day of the pour.
Concrete Placement Tips
Control joints are the single most under-specified detail in residential construction in Texas. Please click here for more information.
If control joints are cut at least 1/4 of the depth of the cap within the first 24 hours, the next thing that can be done to lower the probability of cracking is to impart tensile strength with a second lamina of reinforcement towards the top of the slab (rebar towards the bottom, welded-wire mesh towards the top perhaps).
For a fun self-education on mix-design, water-to-cement ratio, curing, etc. Check out this old video from the Portland Cement Association (PCA). It is funny in a corny, old Midwestern way.
Handle your concrete placement team carefully: all men have egos, and few like a “youtube expert”. Ask questions about their process in a way that will bring out their best work.
If placing in cool weather use FritzPack NCA (Non-Chloride Accelerator) available locally (The Stain Store) or click here for a link to purchase online.
Consider buying them pizza and/or beer at towards the end of the pour day (fat+drunk is not good, but sticking around for a few more runs with the power-trowel could make the slab that much better.
Do not use curing blankets. Curing compounds are only OK if planning on grinding for Class-C or Class-B aggregate exposure before framing (otherwise, it will result in unnecessary grinding). Water curing is ideal. Consider making a dam to create a 1” pond over the slab rather than just using a sprinkler. If you use a sprinkler, move the hose regularly and know that once the slab full dries out, no amount of water will make it start hydrating again.
Talk to your concrete placement team: if they is comfortable with high-performance installations, (low water mixes with plasticizers over plastic with spray-on finishing aids, etc.) that’s great. However if they place great slabs without all of that, let them do what they know best. Order a more cement-rich mix for the cap of the interior slab; beams may be place per engineering plan, and a five or six-sack mix will set the finishers up for a prettier floor.
Tips for Framing
Do not stack lumber on the slab any longer than needed because the concrete will age darker or lighter where it is covered or not.
Be careful not to get air-tool oil on the slab because it penetrates the concrete and seals it from light washes of acid stain.
If you spill a coke or coffee on the slab, clean it up promptly because if allowed to sit it will react with the hydrated lime and make a blob that doesn’t stain.
Use blue chalk rather than red because red chalk can chemically bond to the concrete (it’s iron oxide - same result as English Red acid stain).
Clean up unneeded lines with a wet rag followed by a dry rag promptly.
Use pencil instead of Sharpie Pens or markers.
Do not Ram-set into concrete for bracing where it will be seen.
Sweep up at the end of each day because the concrete will age darker or lighter where it is covered or not (plus you will feel better about your work).
Wall plates for doorways and cased openings need to be cut out promptly.
Tips for MEP (mechanical, electrical, and plumbing)
Install your conduits under the reinforcement when you rough in the slab.
If you spill a coke or coffee on the slab, clean it up promptly because if allowed to sit it will react with the hydrated lime and make a blob that doesn’t stain.
If you miss a slab penetration, let us know as early as possible. We have come up with dozens (maybe hundreds) of creative solutions to these problems before. We will make something special for the client that will be better than if you did everything perfect in the first place. We will be cool about it because we are also human beings who make mistakes at work, and at the end of the day we all just want happy clients.
Sweep up at the end of each day because the concrete will age darker or lighter where it is covered or not (plus you will feel better about your work).
Tips for Spray Foam Installation
Come in after us if possible so we don’t have to worry about you spraying closed-foam insulation on the concrete (it takes surprisingly aggressive abrasives to grind that stuff off, and that might be outside of the approved proposal).
If you do come before us, mask off the floor.
If you spill a coke or coffee on the slab, clean it up promptly because if allowed to sit it will react with the hydrated lime and make a blob that doesn’t stain.
Tips for Trim Carpentry
If the drywall team made a mess, and you don’t want to install trim on texture-covered paper, please replace the paper rather than just removing it because the paper will function as masking for the painter who comes behind you. We are glad to help with this work if you contact us.
If setting cabinets that are to be stained+finished in place, replace ram-board with paper so it can function as the masking. The only thing that we really worry about screwing up the floor is masking tape. Avoid taping directly to the floor.
Tips for painting
Do not tape directly to the floor if you can avoid it.
If you can’t avoid that, do not leave the tape down any longer than you must.
Consider using a spray-shield and a rag with solvent to fix mistakes: aside from tape, this finish is hard to damage.
Tips for masonry
If working indoors, put OSB or other sheet-stock over ram-board to further protect the floor from falling rocks.
Do not tape to the floor indoors - rock dust is no problem and tape lines in the middle are especially tough to fix.
If you are working outside, and the concrete is acid stained and sealed with acrylic, you may tape to it for up to 7 days with no problem. Contact us if you are not sure.
Tips for the final polish
Schedule this after installing appliances and amid the final cleaning.
This can actually be omitted if you like how the floors look now.
The floors will have been chemically hardened, diamond polished and sealed - the final polish is more like detailing at a new car lot than a paint job.
So folks like a matte finish, and even with a 400 grit pad on the burnisher, a final polish is a bit of a polish.
We are happy to omit the 5-10% we left out for the final polish if that makes you happier than us doing that work.
The final polish is the final polish
It is not a cleaning service: we only budget around an hour/1000sf to get it ready for stain-guard and polishing.
It should be late enough in the project to not need another one.